擊這里在線咨詢(xún)客服")
1 Scrapy 爬蟲(chóng)完整案例-基礎(chǔ)篇
1.1 Scrapy 爬蟲(chóng)案例一
Scrapy 爬蟲(chóng)案例:爬取騰訊網(wǎng)招聘信息
案例步驟:
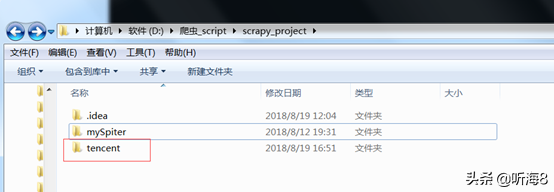
第一步:創(chuàng)建項(xiàng)目。
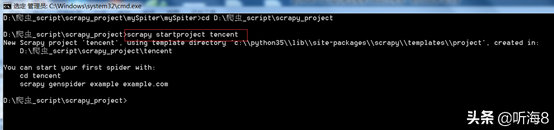
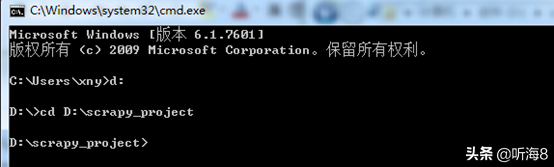
在 dos下切換到目錄
D:爬蟲(chóng)_scriptscrapy_project
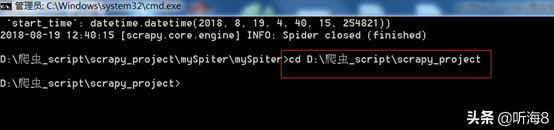
新建一個(gè)新的爬蟲(chóng)項(xiàng)目:scrapy startproject tencent
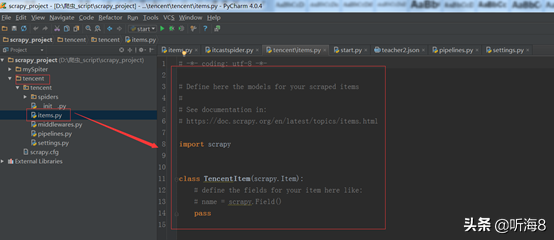
第二步:編寫(xiě) items.py 文件,設(shè)置好需要保存的數(shù)據(jù)字段。
import scrapy
class TencentItem(scrapy.Item):
# 職位名
positionname = scrapy.Field()
# 詳情連接
positionlink = scrapy.Field()
# 職位類(lèi)別
positionType = scrapy.Field()
# 招聘人數(shù)
peopleNum = scrapy.Field()
# 工作地點(diǎn)
workLocation = scrapy.Field()
# 發(fā)布時(shí)間
publishTime = scrapy.Field()

第三步:創(chuàng)建爬蟲(chóng)。
在 dos下切換到目錄
D:爬蟲(chóng)_scriptscrapy_projecttencenttencentspiders
用命令 scrapy genspider tencents "tencent.com" 創(chuàng)建爬蟲(chóng)。
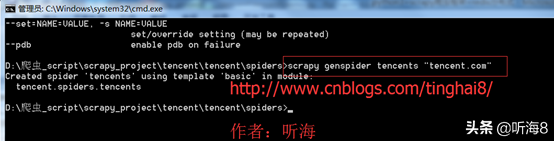
備注:因?yàn)橛妹顒?chuàng)建的時(shí)候,爬蟲(chóng)名稱(chēng)不能和域名tencent.com 一樣,所以創(chuàng)建的時(shí)候,爬蟲(chóng)名為:tencents,創(chuàng)建完之后,可以把爬蟲(chóng)名修改成 tencent。
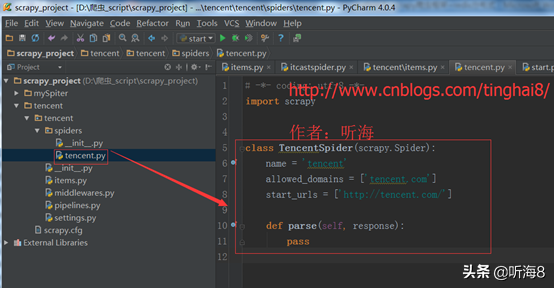
第四步:編寫(xiě)爬蟲(chóng)文件。
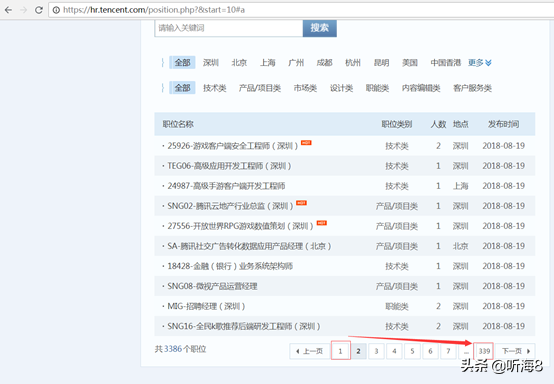
從圖片中看到tencent招聘信息有339頁(yè)。
第一頁(yè)的鏈接地址:
https://hr.tencent.com/position.php?&start=0
第二頁(yè)的鏈接地址:
https://hr.tencent.com/position.php?&start=10
最后一頁(yè)的鏈接地址:
https://hr.tencent.com/position.php?&start=3380
通過(guò)分析我們得知,每一頁(yè)的的鏈接地址start的值遞增10,就是下一頁(yè)的地址。

通過(guò)對(duì)頁(yè)面的分析,得出需要保存的數(shù)據(jù)字段在頁(yè)面上的位置。
info= response.xpath("//tr[@class='even'] | //tr[@class='odd']")
each in info
# 職位名
item['positionname'] = each.xpath("./td[1]/a/text()").extract()[0]
# 詳情連接
item['positionlink'] = each.xpath("./td[1]/a/@href").extract()[0]
# 職位類(lèi)別
item['positionType'] = each.xpath("./td[2]/text()").extract()[0]
# 招聘人數(shù)
item['peopleNum'] = each.xpath("./td[3]/text()").extract()[0]
# 工作地點(diǎn)
item['workLocation'] = each.xpath("./td[4]/text()").extract()[0]
# 發(fā)布時(shí)間
item['publishTime'] = each.xpath("./td[5]/text()").extract()[0]
編寫(xiě)完整的爬蟲(chóng)文件。
import scrapy,sys,os
path = os.path.dirname(os.path.dirname(os.path.dirname(os.path.abspath(__file__))))
#print(path)
sys.path.Append(path)
from tencent.items import TencentItem
class TencentpositionSpider(scrapy.Spider):
name = "tencent"
allowed_domains = ["tencent.com"]
url = "http://hr.tencent.com/position.php?&start="
offset = 0
start_urls = [url + str(offset)]
def parse(self, response):
info= response.xpath("//tr[@class='even'] | //tr[@class='odd']")
for each in info:
# 初始化模型對(duì)象
item = TencentItem()
item['positionname'] = each.xpath("./td[1]/a/text()").extract()[0]
# 詳情連接
item['positionlink'] = each.xpath("./td[1]/a/@href").extract()[0]
# 職位類(lèi)別
item['positionType'] = each.xpath("./td[2]/text()").extract()[0]
# 招聘人數(shù)
item['peopleNum'] = each.xpath("./td[3]/text()").extract()[0]
# 工作地點(diǎn)
item['workLocation'] = each.xpath("./td[4]/text()").extract()[0]
# 發(fā)布時(shí)間
item['publishTime'] = each.xpath("./td[5]/text()").extract()[0]
#將獲取的數(shù)據(jù)交給管道文件 pipelines ,yield的作用是把一個(gè)函數(shù)當(dāng)成一個(gè)生成器,程序每次執(zhí)行到y(tǒng)ield時(shí),返回一個(gè)值,程序會(huì)先暫停,下次調(diào)用再返回一個(gè)值,程序會(huì)接著暫停....
yield item
if self.offset < 3390:
self.offset += 10
# 每次處理完一頁(yè)的數(shù)據(jù)之后,重新發(fā)送下一頁(yè)頁(yè)面請(qǐng)求
# self.offset自增10,同時(shí)拼接為新的 url,并調(diào)用回調(diào)函數(shù) self.parse 處理 Response
yield scrapy.Request(self.url + str(self.offset), callback = self.parse)
第五步:編寫(xiě)管道文件:TencentPipeline。
import json
class TencentPipeline(object):
# __init__方法是可選的,做為類(lèi)的初始化方法
def __init__(self):
# 創(chuàng)建了一個(gè) tencent.json 文件,用來(lái)保存數(shù)據(jù)
self.filename = open("tencent.json", "wb")
# process_item方法是必須寫(xiě)的,用來(lái)處理item數(shù)據(jù)
def process_item(self, item, spider):
text = json.dumps(dict(item), ensure_ascii = False) + ",n"
# 把數(shù)據(jù)寫(xiě)入到tencent.json 文件中,編碼為:utf-8
self.filename.write(text.encode("utf-8"))
return item
# close_spider方法是可選的,結(jié)束時(shí)調(diào)用這個(gè)方法
def close_spider(self, spider):
self.filename.close()
第六步:修改 settings 文件。

在settings.py文件配置里指定剛才編寫(xiě)的管道文件名:TencentPipeline。

下載的數(shù)據(jù)比較多,需要設(shè)定一個(gè)下載延時(shí)時(shí)間,以免下載的數(shù)據(jù)不全。

設(shè)置爬蟲(chóng)請(qǐng)求的默認(rèn)頭信息。
第七步:運(yùn)行爬蟲(chóng)。
在 dos下切換到目錄
D:爬蟲(chóng)_scriptscrapy_projecttencenttencent 下
通過(guò)命令運(yùn)行爬蟲(chóng) :scrapy crawl tencent
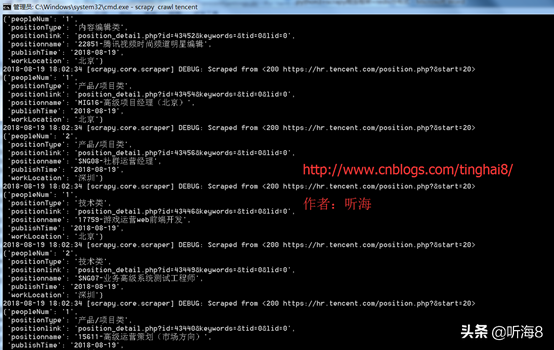
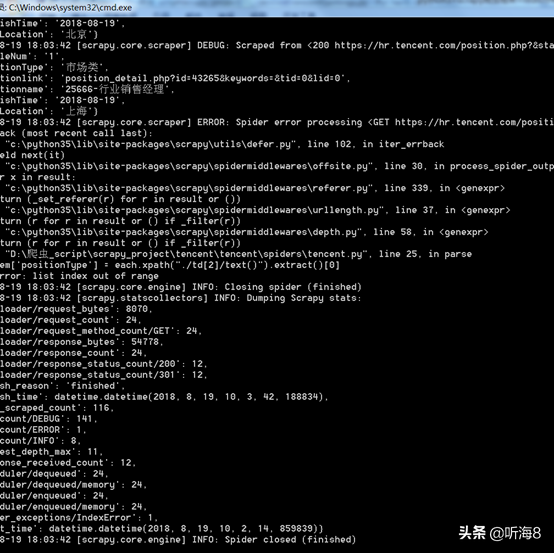
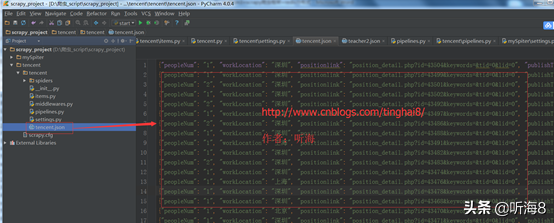
第八步:查看爬取的結(jié)果。
查看新建的tencent.json 數(shù)據(jù)文件。
1.2 Scrapy 爬蟲(chóng)案例二
Scrapy 爬蟲(chóng)案例:斗魚(yú)圖片下載
案例步驟:
第一步:通過(guò) Fiddler 進(jìn)行手機(jī)抓包。
通過(guò)Fiddler抓包工具,可以抓取手機(jī)的網(wǎng)絡(luò)通信,但前提是手機(jī)和電腦處于同一局域網(wǎng)內(nèi)(WI-FI或熱點(diǎn)),然后進(jìn)行以下設(shè)置:
用 Fiddler 對(duì) Android 應(yīng)用進(jìn)行抓包的設(shè)置:
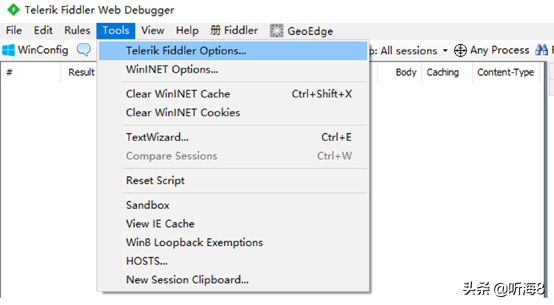
1、打開(kāi) Fiddler 設(shè)置(Tools->options)。
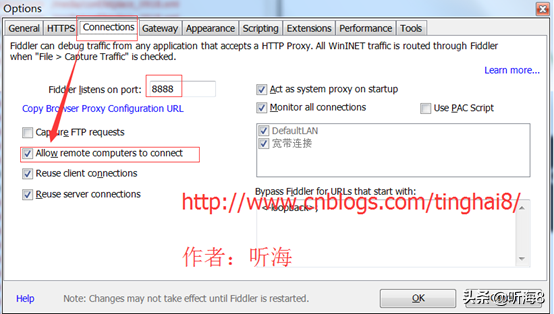
2、在 Connections 里設(shè)置允許連接遠(yuǎn)程計(jì)算機(jī),確認(rèn)后重新啟動(dòng) Fiddler 。
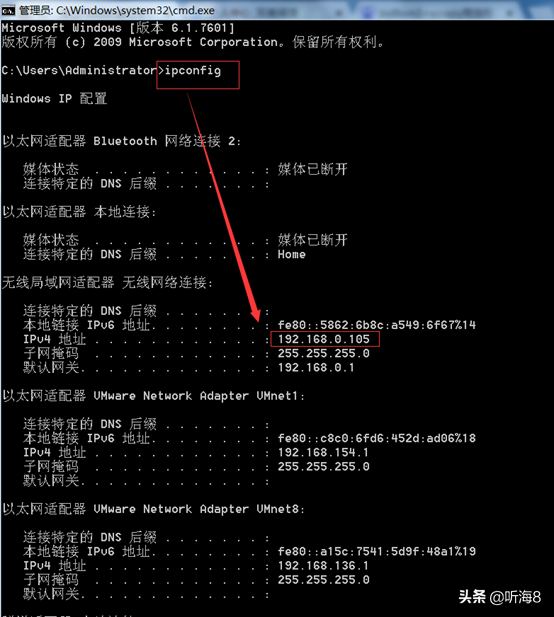
3、在命令提示符下輸入 ipconfig 查看本電腦 IP。
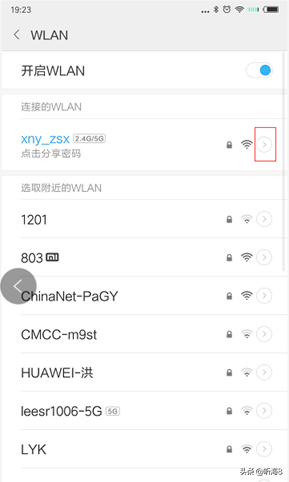
4、打開(kāi) Android 設(shè)備的“設(shè)置”->“WLAN”,找到你要連接的網(wǎng)絡(luò),進(jìn)入該網(wǎng)絡(luò)。
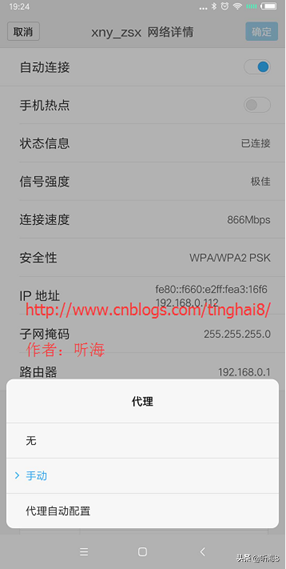
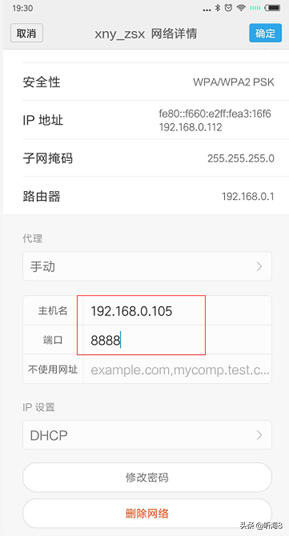
5、在“代理”后面的輸入框選擇“手動(dòng)”,在“代理服務(wù)器主機(jī)名”后面的輸入框輸入電腦的 ip 地址,在“代理服務(wù)器端口”后面的輸入框輸入 8888,然后點(diǎn)擊“保存”按鈕。
6、啟動(dòng) Android 設(shè)備中的瀏覽器,訪問(wèn)網(wǎng)頁(yè)即可在 Fiddler 中可以看到完成的請(qǐng)求和響應(yīng)數(shù)據(jù)。

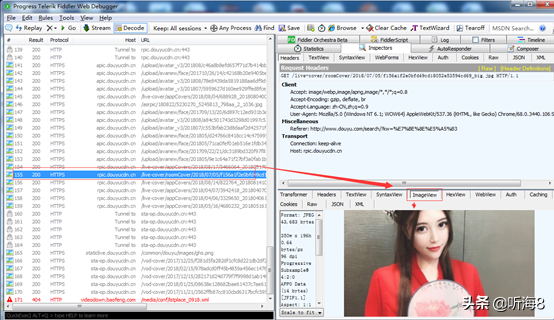
通過(guò)抓包,我們可以看出,請(qǐng)求返回的每頁(yè)圖片數(shù)據(jù)是一個(gè) json 格式的文件,我們找到每頁(yè)對(duì)應(yīng)的 json 文件即可。
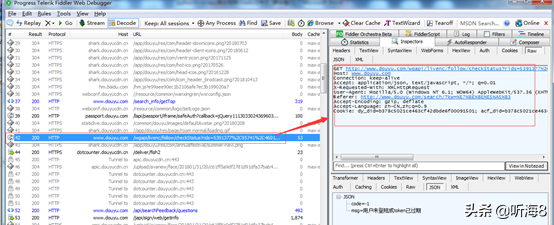
第二步:每頁(yè)請(qǐng)求返回的json數(shù)據(jù)分析。
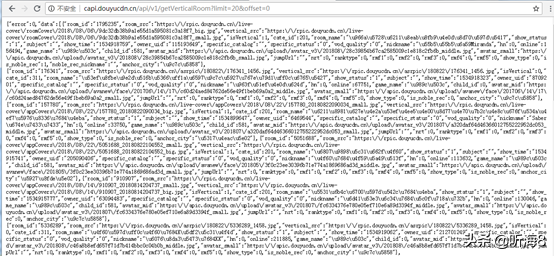
第 1 頁(yè) URL 地址:
http://capi.douyucdn.cn/api/v1/getVerticalRoom?limit=20&offset=0
第 2 頁(yè) URL 地址:
http://capi.douyucdn.cn/api/v1/getVerticalRoom?limit=20&offset=20

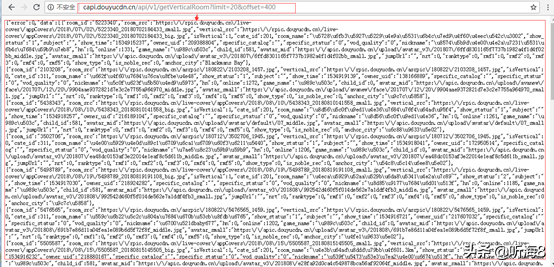
第 20 頁(yè)地址:
http://capi.douyucdn.cn/api/v1/getVerticalRoom?limit=20&offset=400
第 35 頁(yè)地址:

顯示如上,表示數(shù)據(jù)沒(méi)有35頁(yè)。
【limit】:表示每頁(yè)20條數(shù)據(jù),每頁(yè)偏移量是20。
【offset】:表示頁(yè)數(shù)。
把第 1 頁(yè)的返回的 json 格式的數(shù)據(jù)拷貝,通過(guò) json 在線解析工具(https://www.json.cn/)對(duì)數(shù)據(jù)進(jìn)行解析,如下:

其中每一頁(yè)20條數(shù)據(jù),每條數(shù)據(jù)顯示如下:

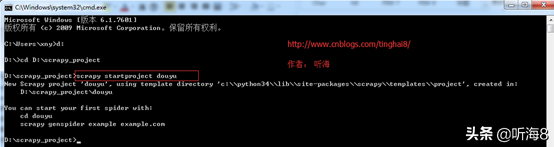
第三步:創(chuàng)建 scrapy 爬蟲(chóng)項(xiàng)目。
在 dos下切換到目錄
D:scrapy_project
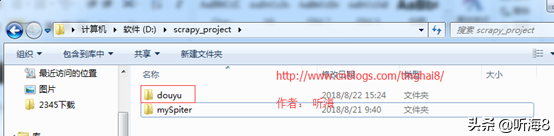
新建一個(gè)新的爬蟲(chóng)項(xiàng)目:scrapy startproject douyu
第四步:明確需要爬取的字段,編寫(xiě) items 文件。
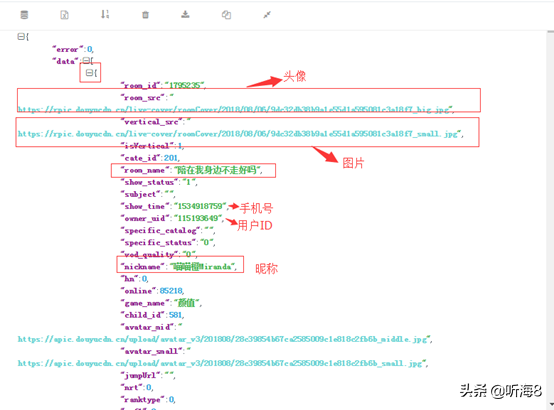
對(duì)于上面的信息,我們只抓取 2 個(gè)字段(昵稱(chēng)和圖片鏈接)。
為了保存圖片,還需增加一個(gè)圖片保存路徑的字段。
編寫(xiě) Items.py 文件。
import scrapy
class DouyuItem(scrapy.Item):
# define the fields for your item here like:
#昵稱(chēng)
nickname = scrapy.Field()
#圖片下載鏈接
imagelink = scrapy.Field()
#圖片下載的本地保存路徑
imagePath = scrapy.Field()
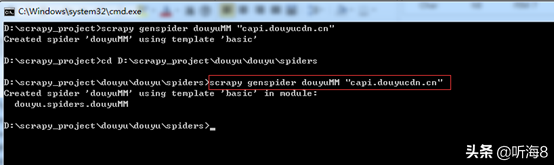
第五步:新建爬蟲(chóng),編寫(xiě)爬蟲(chóng)文件。
在 DOS 下切換目錄
D:scrapy_projectdouyudouyuspiders
執(zhí)行命令新建爬蟲(chóng)命令:
scrapy genspider douyuMM "capi.douyucdn.cn"
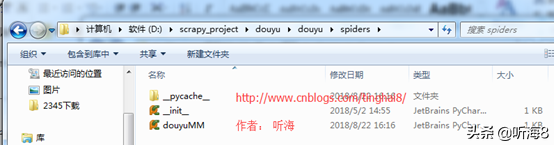
編寫(xiě)爬蟲(chóng)文件。
import scrapy,sys,os
import json
path = os.path.dirname(os.path.dirname(os.path.dirname(os.path.abspath(__file__))))
sys.path.append(path)
from douyu.items import DouyuItem
class DouyummSpider(scrapy.Spider):
#爬蟲(chóng)名
name = "douyuMM"
#允許爬蟲(chóng)作用的范圍
allowed_domains = ["capi.douyucdn.cn"]
# URL 變量
offset = 0
#基礎(chǔ)的 URL
url = "http://capi.douyucdn.cn/api/v1/getVerticalRoom?limit=20&offset="
# 爬蟲(chóng)起始的url
start_urls = [url + str(offset)]
def parse(self, response):
# 請(qǐng)求返回的數(shù)據(jù)是json格式,需要把json格式的數(shù)據(jù)轉(zhuǎn)換為 Python 格式,data 段是列表
data = json.loads(response.text)["data"]
for each in data:
#定義一個(gè)Item 對(duì)象,用來(lái)保存數(shù)據(jù)的
item = DouyuItem()
# 取 data 列表中的值,放到 Item 對(duì)象中
item["nickname"] = each["nickname"]
item["imagelink"] = each["vertical_src"]
## 將獲取的數(shù)據(jù)交給管道文件 pipelines ,yield的作用是把一個(gè)函數(shù)當(dāng)成一個(gè)生成器,程序每次執(zhí)行到y(tǒng)ield時(shí),返回一個(gè)值,程序會(huì)先暫停,下次調(diào)用再返回一個(gè)值,程序會(huì)接著暫停....
yield item
if self.offset < 400:
self.offset += 20
# 每次處理完一頁(yè)的數(shù)據(jù)之后,重新發(fā)送下一頁(yè)頁(yè)面請(qǐng)求
# self.offset自增20,同時(shí)拼接為新的 url,并調(diào)用回調(diào)函數(shù) self.parse 處理 Response
yield scrapy.Request(self.url + str(self.offset), callback = self.parse)
第六步:分析 pipelines 管道文件處理的數(shù)據(jù)類(lèi)型。
第一個(gè)案例講的 pipelines 管道文件處理的是 html 頁(yè)面的靜態(tài)文本,這個(gè)案例需要處理的是圖片,需要把圖片下載下來(lái),需要對(duì) Settings.py 文件進(jìn)行相應(yīng)的配置。
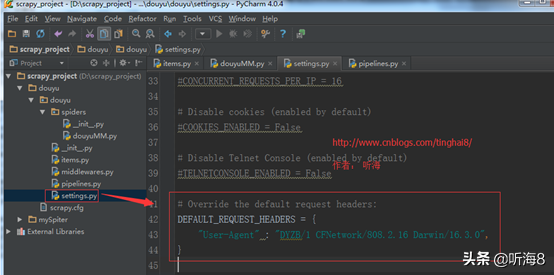
第七步:修改 Settings.py 文件。
1、修改默認(rèn)的請(qǐng)求信息(手機(jī)端瀏覽器)。
# Override the default request headers:
DEFAULT_REQUEST_HEADERS = {
"User-Agent" : "DYZB/1 CFNetwork/808.2.16 Darwin/16.3.0",
}
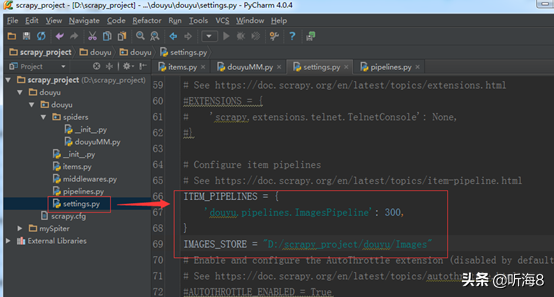
2.設(shè)置管道文件(管道文件類(lèi)型:ImagesPipeline)
ImagesPipeline 是專(zhuān)門(mén)處理圖片的管道文件。
# Configure item pipelines
# See https://doc.scrapy.org/en/latest/topics/item-pipeline.html
ITEM_PIPELINES = {
'douyu.pipelines.ImagesPipeline': 300,
}
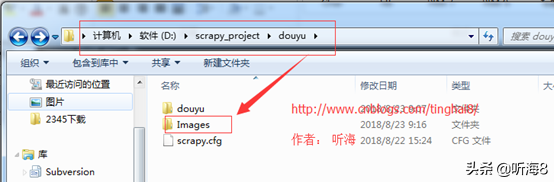
3.增加一個(gè)存儲(chǔ)下載圖片的本地路徑。
IMAGES_STORE = "D:/scrapy_project/douyu/Images"
后續(xù)可以在 pipelines 管道文件程序里直接使用自己定義的圖片存儲(chǔ)路徑變量。
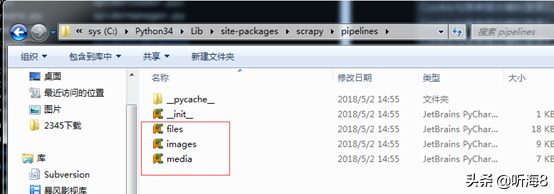
第七步:編寫(xiě) pipelines 管道文件。
pipelines 管道文件有專(zhuān)門(mén)處理 files(文件)、images(圖片)、media(視頻)3個(gè)庫(kù)。
C:Python34Libsite-packagesscrapypipelines
查看 images.py 源碼。
"""
Images Pipeline
See documentation in topics/media-pipeline.rst
"""
import functools
import hashlib
import six
try:
from cStringIO import StringIO as BytesIO
except ImportError:
from io import BytesIO
from PIL import Image
from scrapy.utils.misc import md5sum
from scrapy.utils.python import to_bytes
from scrapy.http import Request
from scrapy.settings import Settings
from scrapy.exceptions import DropItem
#TODO: from scrapy.pipelines.media import MediaPipeline
from scrapy.pipelines.files import FileException, FilesPipeline
class NoimagesDrop(DropItem):
"""Product with no images exception"""
class ImageException(FileException):
"""General image error exception"""
class ImagesPipeline(FilesPipeline):
"""Abstract pipeline that implement the image thumbnail generation logic
"""
MEDIA_NAME = 'image'
# Uppercase attributes kept for backward compatibility with code that subclasses
# ImagesPipeline. They may be overridden by settings.
MIN_WIDTH = 0
MIN_HEIGHT = 0
EXPIRES = 90
THUMBS = {}
DEFAULT_IMAGES_URLS_FIELD = 'image_urls'
DEFAULT_IMAGES_RESULT_FIELD = 'images'
def __init__(self, store_uri, download_func=None, settings=None):
super(ImagesPipeline, self).__init__(store_uri, settings=settings,
download_func=download_func)
if isinstance(settings, dict) or settings is None:
settings = Settings(settings)
resolve = functools.partial(self._key_for_pipe,
base_class_name="ImagesPipeline",
settings=settings)
self.expires = settings.getint(
resolve("IMAGES_EXPIRES"), self.EXPIRES
)
if not hasattr(self, "IMAGES_RESULT_FIELD"):
self.IMAGES_RESULT_FIELD = self.DEFAULT_IMAGES_RESULT_FIELD
if not hasattr(self, "IMAGES_URLS_FIELD"):
self.IMAGES_URLS_FIELD = self.DEFAULT_IMAGES_URLS_FIELD
self.images_urls_field = settings.get(
resolve('IMAGES_URLS_FIELD'),
self.IMAGES_URLS_FIELD
)
self.images_result_field = settings.get(
resolve('IMAGES_RESULT_FIELD'),
self.IMAGES_RESULT_FIELD
)
self.min_width = settings.getint(
resolve('IMAGES_MIN_WIDTH'), self.MIN_WIDTH
)
self.min_height = settings.getint(
resolve('IMAGES_MIN_HEIGHT'), self.MIN_HEIGHT
)
self.thumbs = settings.get(
resolve('IMAGES_THUMBS'), self.THUMBS
)
@classmethod
def from_settings(cls, settings):
s3store = cls.STORE_SCHEMES['s3']
s3store.AWS_ACCESS_KEY_ID = settings['AWS_ACCESS_KEY_ID']
s3store.AWS_SECRET_ACCESS_KEY = settings['AWS_SECRET_ACCESS_KEY']
s3store.POLICY = settings['IMAGES_STORE_S3_ACL']
gcs_store = cls.STORE_SCHEMES['gs']
gcs_store.GCS_PROJECT_ID = settings['GCS_PROJECT_ID']
store_uri = settings['IMAGES_STORE']
return cls(store_uri, settings=settings)
def file_downloaded(self, response, request, info):
return self.image_downloaded(response, request, info)
def image_downloaded(self, response, request, info):
checksum = None
for path, image, buf in self.get_images(response, request, info):
if checksum is None:
buf.seek(0)
checksum = md5sum(buf)
width, height = image.size
self.store.persist_file(
path, buf, info,
meta={'width': width, 'height': height},
headers={'Content-Type': 'image/jpeg'})
return checksum
def get_images(self, response, request, info):
path = self.file_path(request, response=response, info=info)
orig_image = Image.open(BytesIO(response.body))
width, height = orig_image.size
if width < self.min_width or height < self.min_height:
raise ImageException("Image too small (%dx%d < %dx%d)" %
(width, height, self.min_width, self.min_height))
image, buf = self.convert_image(orig_image)
yield path, image, buf
for thumb_id, size in six.iteritems(self.thumbs):
thumb_path = self.thumb_path(request, thumb_id, response=response, info=info)
thumb_image, thumb_buf = self.convert_image(image, size)
yield thumb_path, thumb_image, thumb_buf
def convert_image(self, image, size=None):
if image.format == 'PNG' and image.mode == 'RGBA':
background = Image.new('RGBA', image.size, (255, 255, 255))
background.paste(image, image)
image = background.convert('RGB')
elif image.mode == 'P':
image = image.convert("RGBA")
background = Image.new('RGBA', image.size, (255, 255, 255))
background.paste(image, image)
image = background.convert('RGB')
elif image.mode != 'RGB':
image = image.convert('RGB')
if size:
image = image.copy()
image.thumbnail(size, Image.ANTIALIAS)
buf = BytesIO()
image.save(buf, 'JPEG')
return image, buf
def get_media_requests(self, item, info):
return [Request(x) for x in item.get(self.images_urls_field, [])]
def item_completed(self, results, item, info):
if isinstance(item, dict) or self.images_result_field in item.fields:
item[self.images_result_field] = [x for ok, x in results if ok]
return item
def file_path(self, request, response=None, info=None):
## start of deprecation warning block (can be removed in the future)
def _warn():
from scrapy.exceptions import ScrapyDeprecationWarning
import warnings
warnings.warn('ImagesPipeline.image_key(url) and file_key(url) methods are deprecated, '
'please use file_path(request, response=None, info=None) instead',
category=ScrapyDeprecationWarning, stacklevel=1)
# check if called from image_key or file_key with url as first argument
if not isinstance(request, Request):
_warn()
url = request
else:
url = request.url
# detect if file_key() or image_key() methods have been overridden
if not hasattr(self.file_key, '_base'):
_warn()
return self.file_key(url)
elif not hasattr(self.image_key, '_base'):
_warn()
return self.image_key(url)
## end of deprecation warning block
image_guid = hashlib.sha1(to_bytes(url)).hexdigest() # change to request.url after deprecation
return 'full/%s.jpg' % (image_guid)
def thumb_path(self, request, thumb_id, response=None, info=None):
## start of deprecation warning block (can be removed in the future)
def _warn():
from scrapy.exceptions import ScrapyDeprecationWarning
import warnings
warnings.warn('ImagesPipeline.thumb_key(url) method is deprecated, please use '
'thumb_path(request, thumb_id, response=None, info=None) instead',
category=ScrapyDeprecationWarning, stacklevel=1)
# check if called from thumb_key with url as first argument
if not isinstance(request, Request):
_warn()
url = request
else:
url = request.url
# detect if thumb_key() method has been overridden
if not hasattr(self.thumb_key, '_base'):
_warn()
return self.thumb_key(url, thumb_id)
## end of deprecation warning block
thumb_guid = hashlib.sha1(to_bytes(url)).hexdigest() # change to request.url after deprecation
return 'thumbs/%s/%s.jpg' % (thumb_id, thumb_guid)
# deprecated
def file_key(self, url):
return self.image_key(url)
file_key._base = True
# deprecated
def image_key(self, url):
return self.file_path(url)
image_key._base = True
# deprecated
def thumb_key(self, url, thumb_id):
return self.thumb_path(url, thumb_id)
thumb_key._base = True
有興趣的同學(xué),可以完整的解讀下。
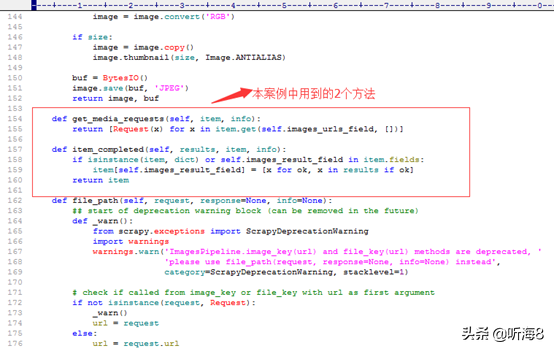
本案例中用到其中2個(gè)方法:
1. get_media_requests(self, item, info)
2. item_completed(self, results, item, info)
編寫(xiě) pipelines 管道文件
#get_media_requests(self, item, info)方法用到 scrapy.Request(image_url)下載圖片,所以需要導(dǎo)入 scrapy 庫(kù)
import scrapy
# 通過(guò) get_project_settings 獲取項(xiàng)目的 settings 文件
from scrapy.utils.project import get_project_settings
# 導(dǎo)入 ImagesPipeline 類(lèi)
from scrapy.pipelines.images import ImagesPipeline
import os
# ImagesPipeline 繼承 ImagesPipeline 父類(lèi),重寫(xiě) ImagesPipeline 類(lèi)
class ImagesPipeline(ImagesPipeline):
# 獲取settings文件里設(shè)置的變量值
IMAGES_STORE = get_project_settings().get("IMAGES_STORE")
def get_media_requests(self, item, info):
# 爬蟲(chóng)爬取到的數(shù)據(jù):圖片的鏈接
image_url = item["imagelink"]
# 發(fā)下載圖片的請(qǐng)求,參數(shù)是爬蟲(chóng)爬取到的圖片地址。發(fā)送請(qǐng)求之后,會(huì)通過(guò)下面的item_completed(self, result, item, info)方法進(jìn)行數(shù)據(jù)的處理。
yield scrapy.Request(image_url)
def item_completed(self, result, item, info):
# 這個(gè)是 item_completed()固定的寫(xiě)法,獲取圖片的名字
image_path = [x["path"] for ok, x in result if ok]
#對(duì)下載的文件重命名
os.rename(self.IMAGES_STORE + "/" + image_path[0], self.IMAGES_STORE + "/" + item["nickname"] + ".jpg")
item["imagePath"] = self.IMAGES_STORE + "/" + item["nickname"]
return item
第八步:?jiǎn)?dòng)爬蟲(chóng),爬取數(shù)據(jù)。
在 dos下切換到目錄
D:scrapy_projectdouyudouyu 下
通過(guò)命令運(yùn)行爬蟲(chóng) :scrapy crawl douyuMM
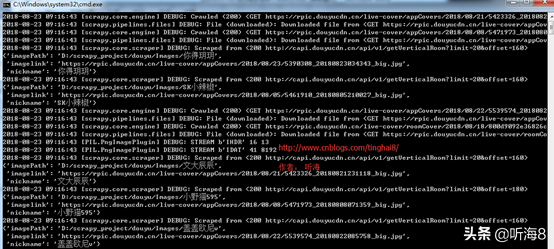

下載完成。
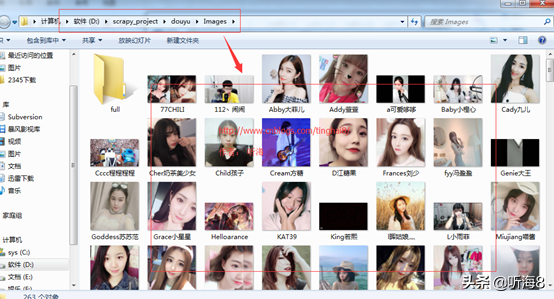
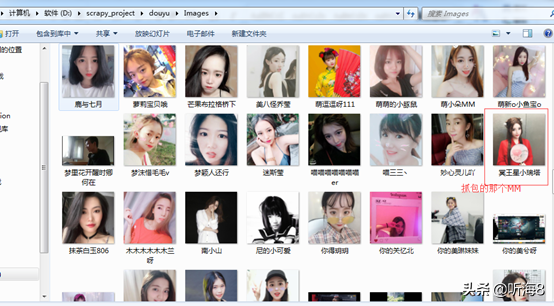
第九步:檢查爬取的數(shù)據(jù)。
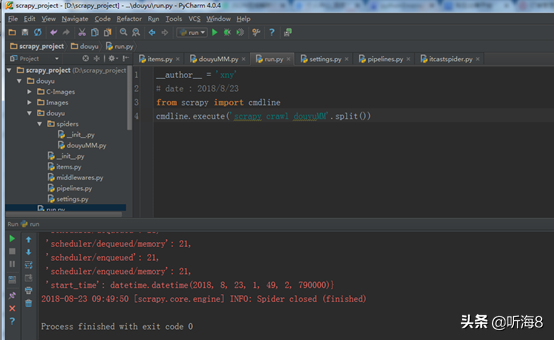
第十步:在項(xiàng)目根目錄下新建 run.py 文件,便于PyCharm 下運(yùn)行調(diào)試腳本。
在 D:scrapy_projectdouyudouyu 下。
新建 run.py 文件。
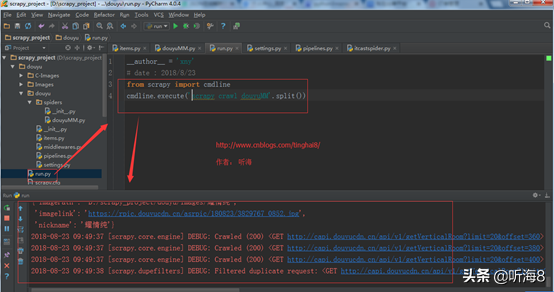
編寫(xiě) run.py 文件。
from scrapy import cmdline
cmdline.execute('scrapy crawl douyu'.split())
設(shè)置 run.py 文件運(yùn)行環(huán)境。
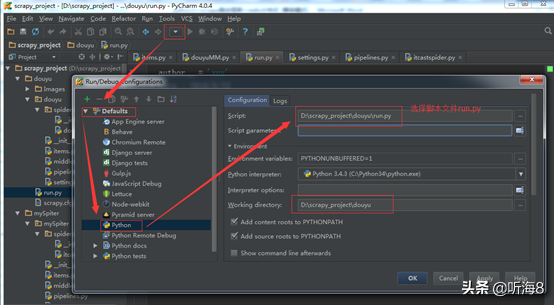
第十一步:在 PyCharm 下運(yùn)行,查看運(yùn)行結(jié)果。

1.3 Scrapy 爬蟲(chóng)案例基礎(chǔ)篇小結(jié)匯總
1、2個(gè)案例爬蟲(chóng)文件里的 scrapy 類(lèi)都是基于scrapy.Spider 基礎(chǔ)類(lèi),Spider類(lèi)是 scrapy爬蟲(chóng)框架實(shí)現(xiàn)爬蟲(chóng)的其中一個(gè)類(lèi),后面還會(huì)講到另外的一個(gè)類(lèi)
scrapy.spiders.CrawlSpider 。
2、第一個(gè)案例的 pipelines 管道文件是處理 html 靜態(tài)文件,第二個(gè)案例 pipelines 管道文件是處理下載圖片的。


